
How to edit with SmartAlt directly from the product catalogueUpdated 8 days ago
Overview
If you’re trying to organize or narrow down products inside the SmartAlt dashboard, you may notice there aren’t many filtering options available there. The recommended workaround is to filter products in Shopify first, then send the filtered selection to SmartAlt using Manage with SmartAlt.
INFO
What this achieves: you can use Shopify’s built-in product filtering (such as Status and Categories) to precisely choose which products SmartAlt will process.
Walkthrough: filter in Shopify, then manage with SmartAlt
1. Open your Shopify Products list - In your Shopify admin, go to Products. This is where you can view your full catalog, including columns like Status, Inventory, and Category.
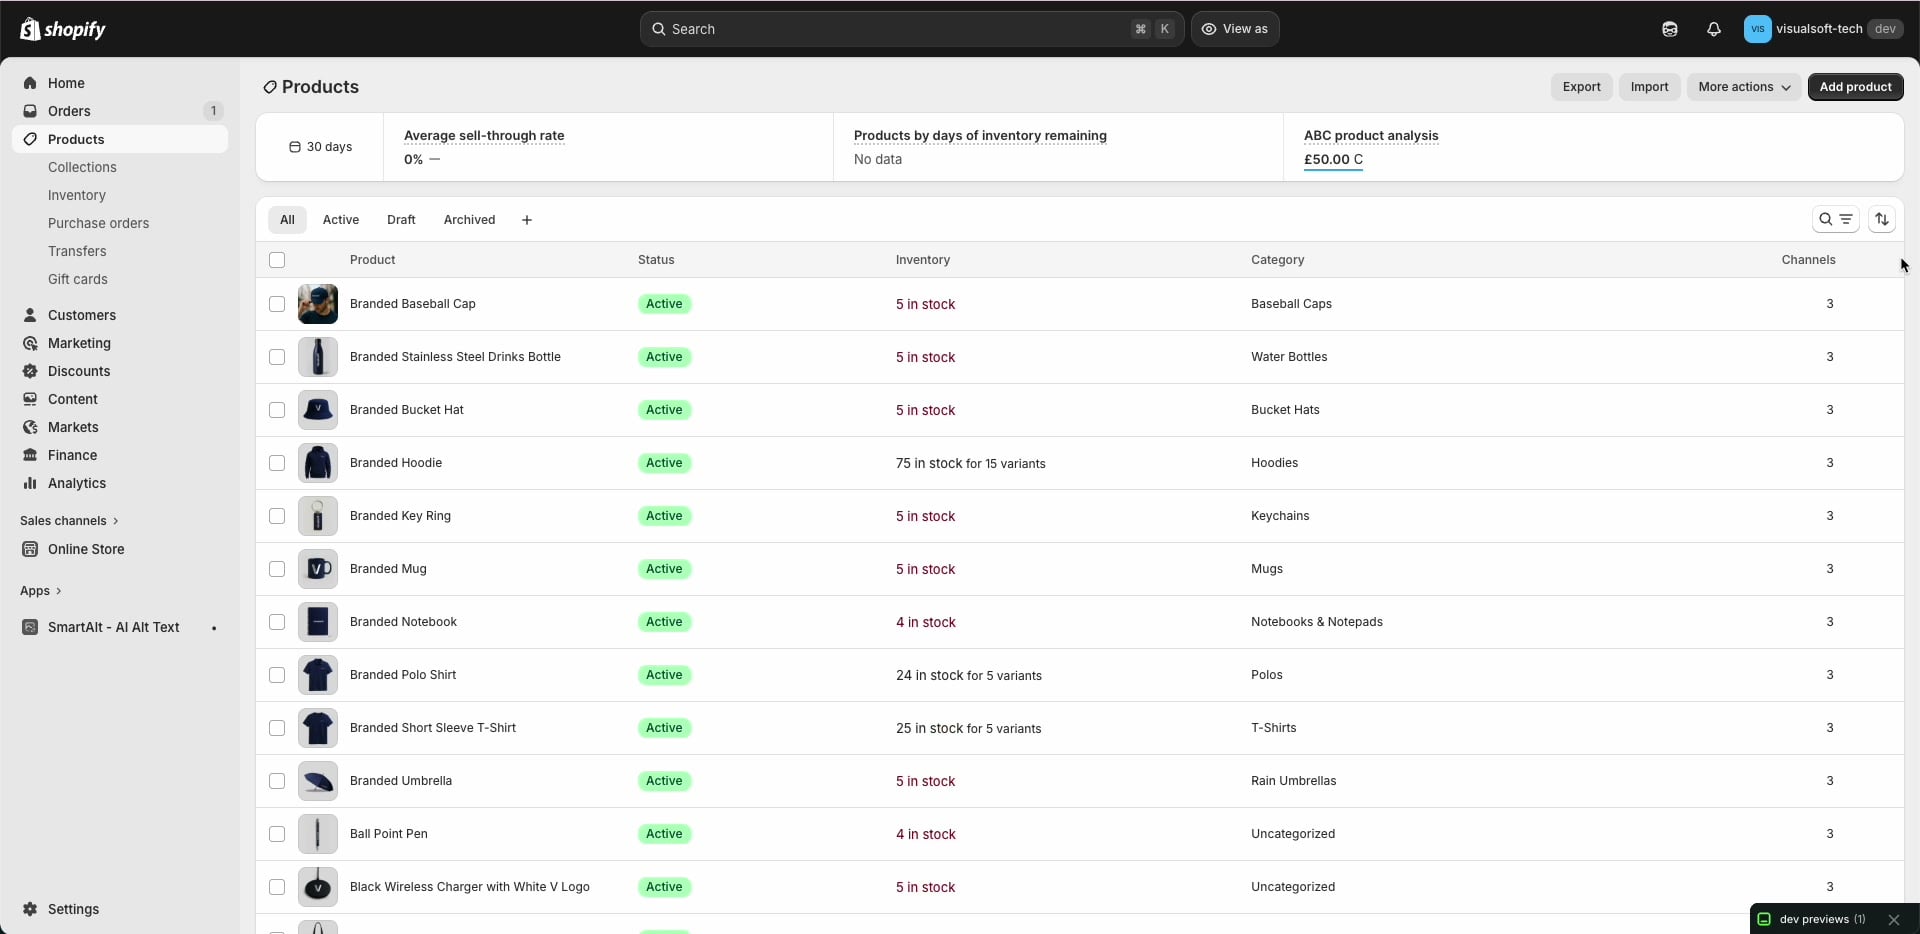
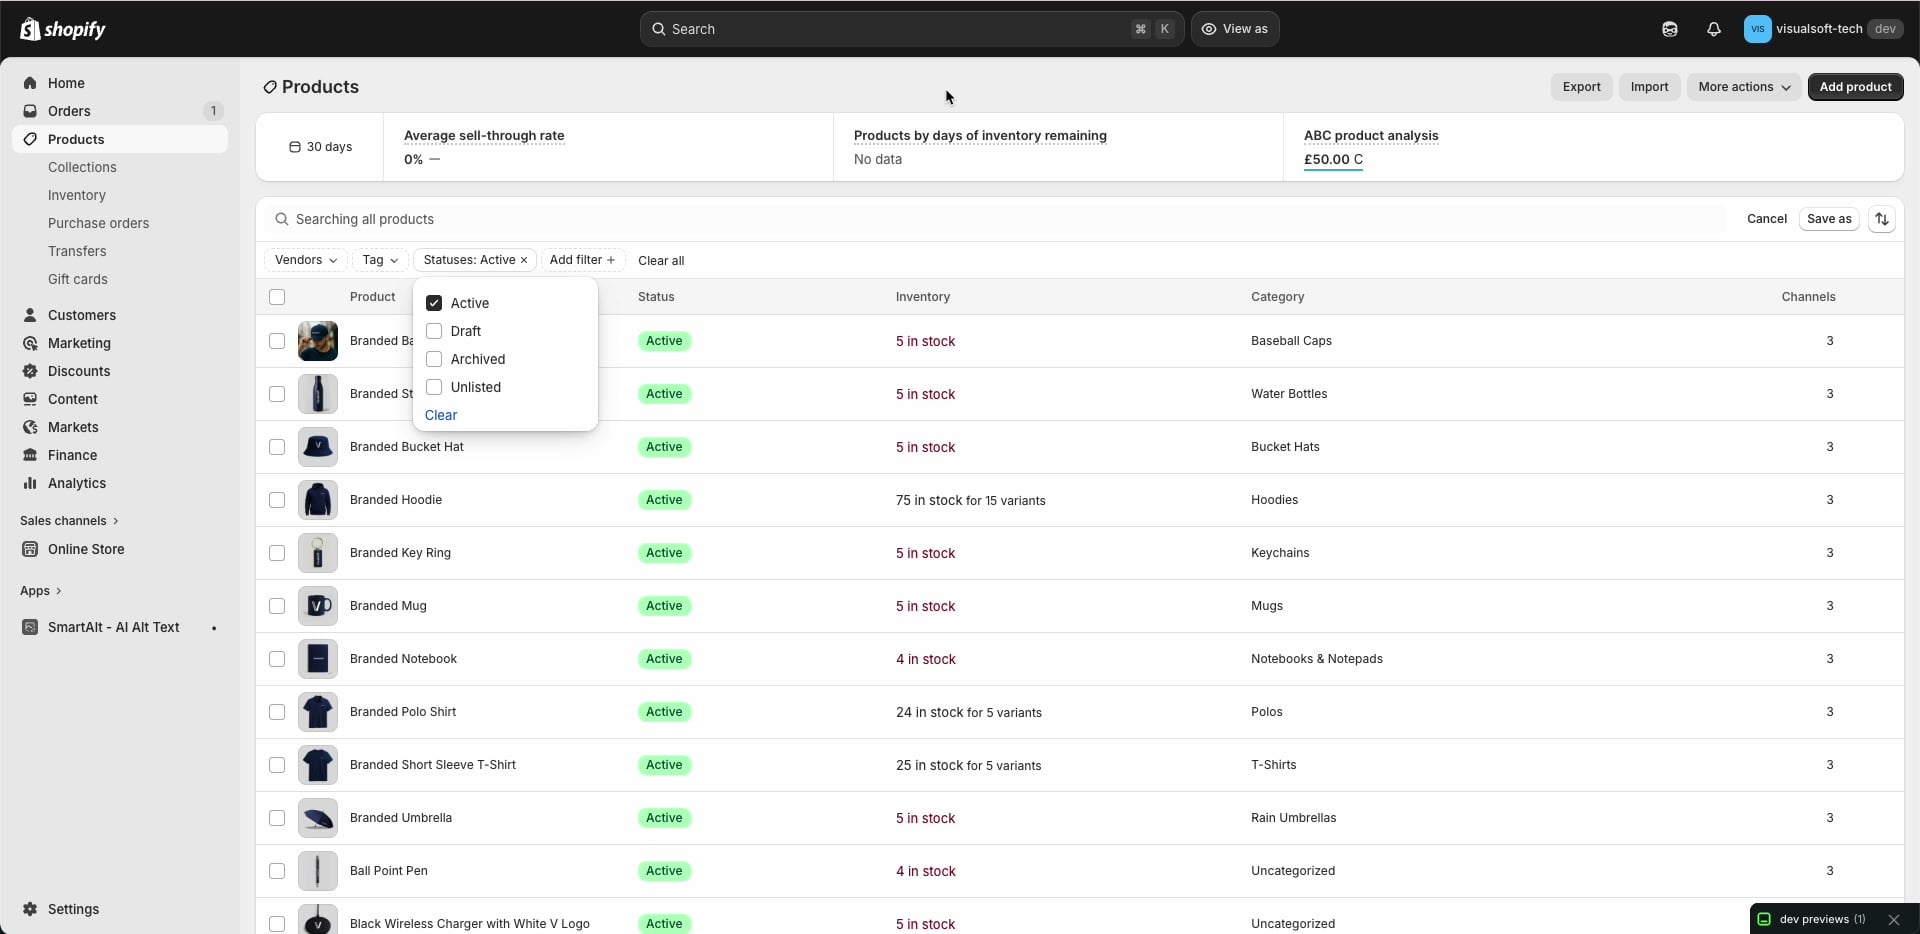
2. Filter by product status - Use the filter bar to narrow the list. Open the Statuses filter and select the statuses you want (for example: Active, Draft, Archived, or Unlisted).
TIP
If you use the same filters regularly, you can save them using Save as on the right side of the filter bar.
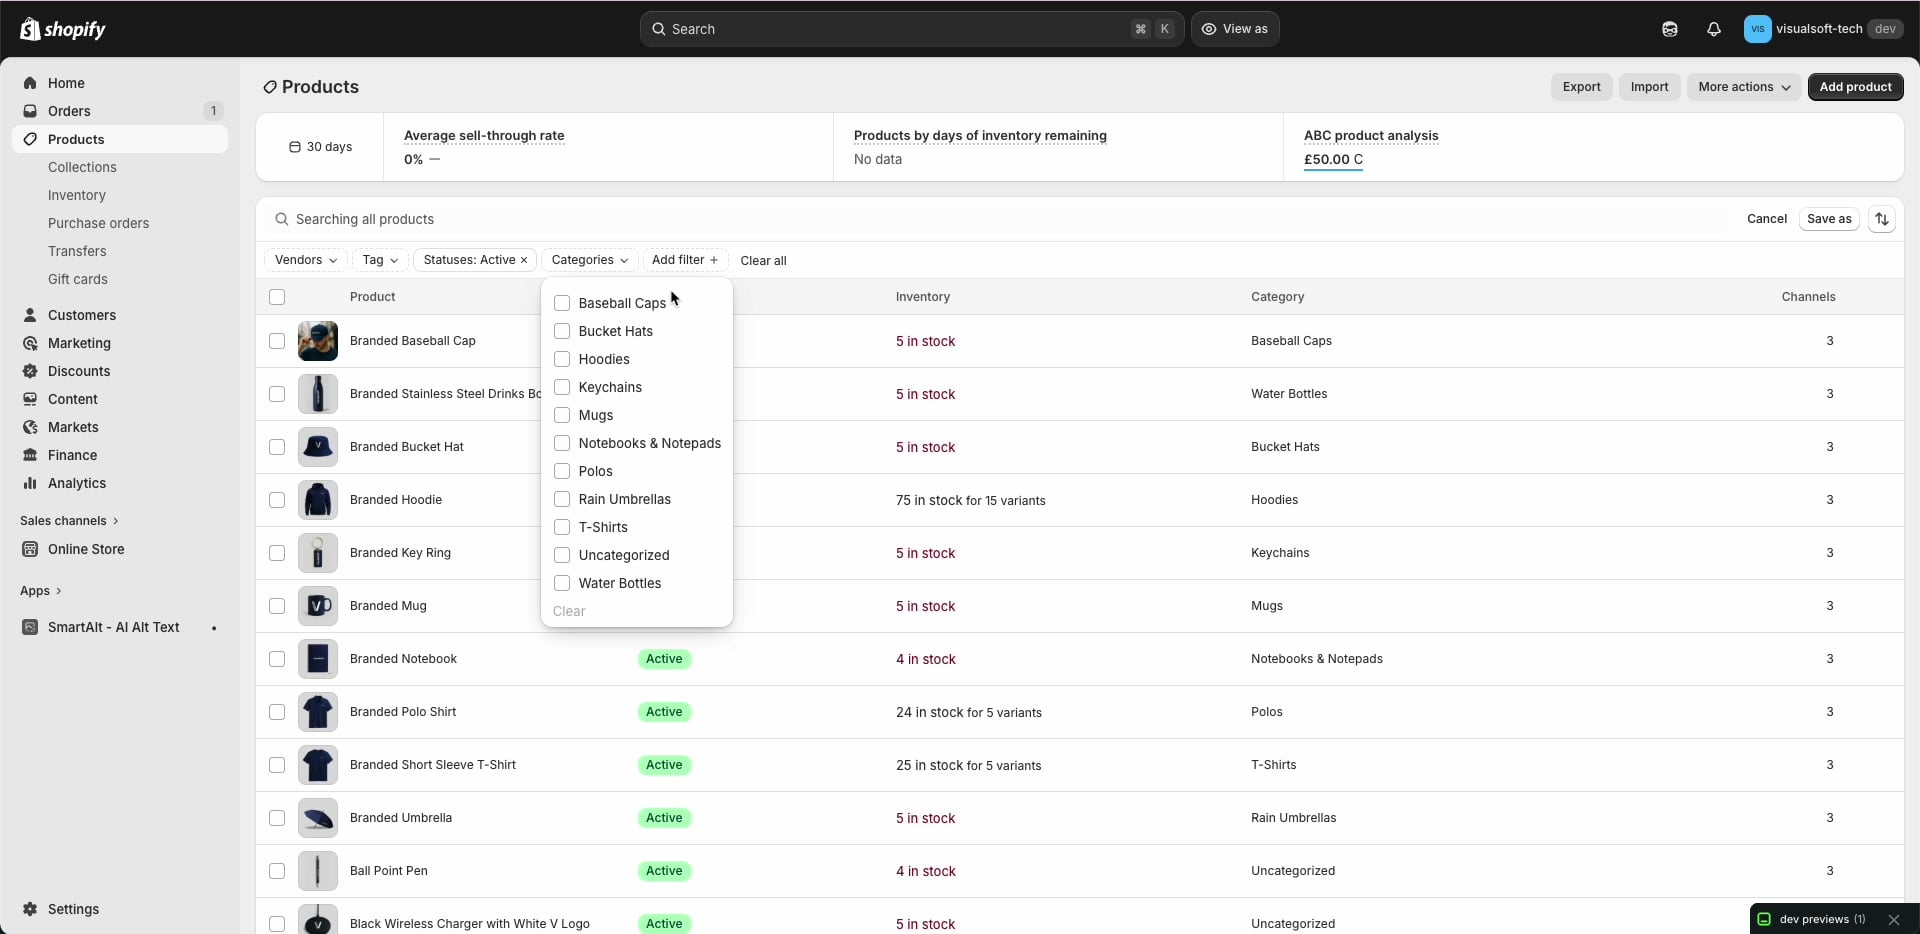
3. Filter by category - Open the Categories filter and tick one or more categories to include. Shopify will update the product list to match your selections.
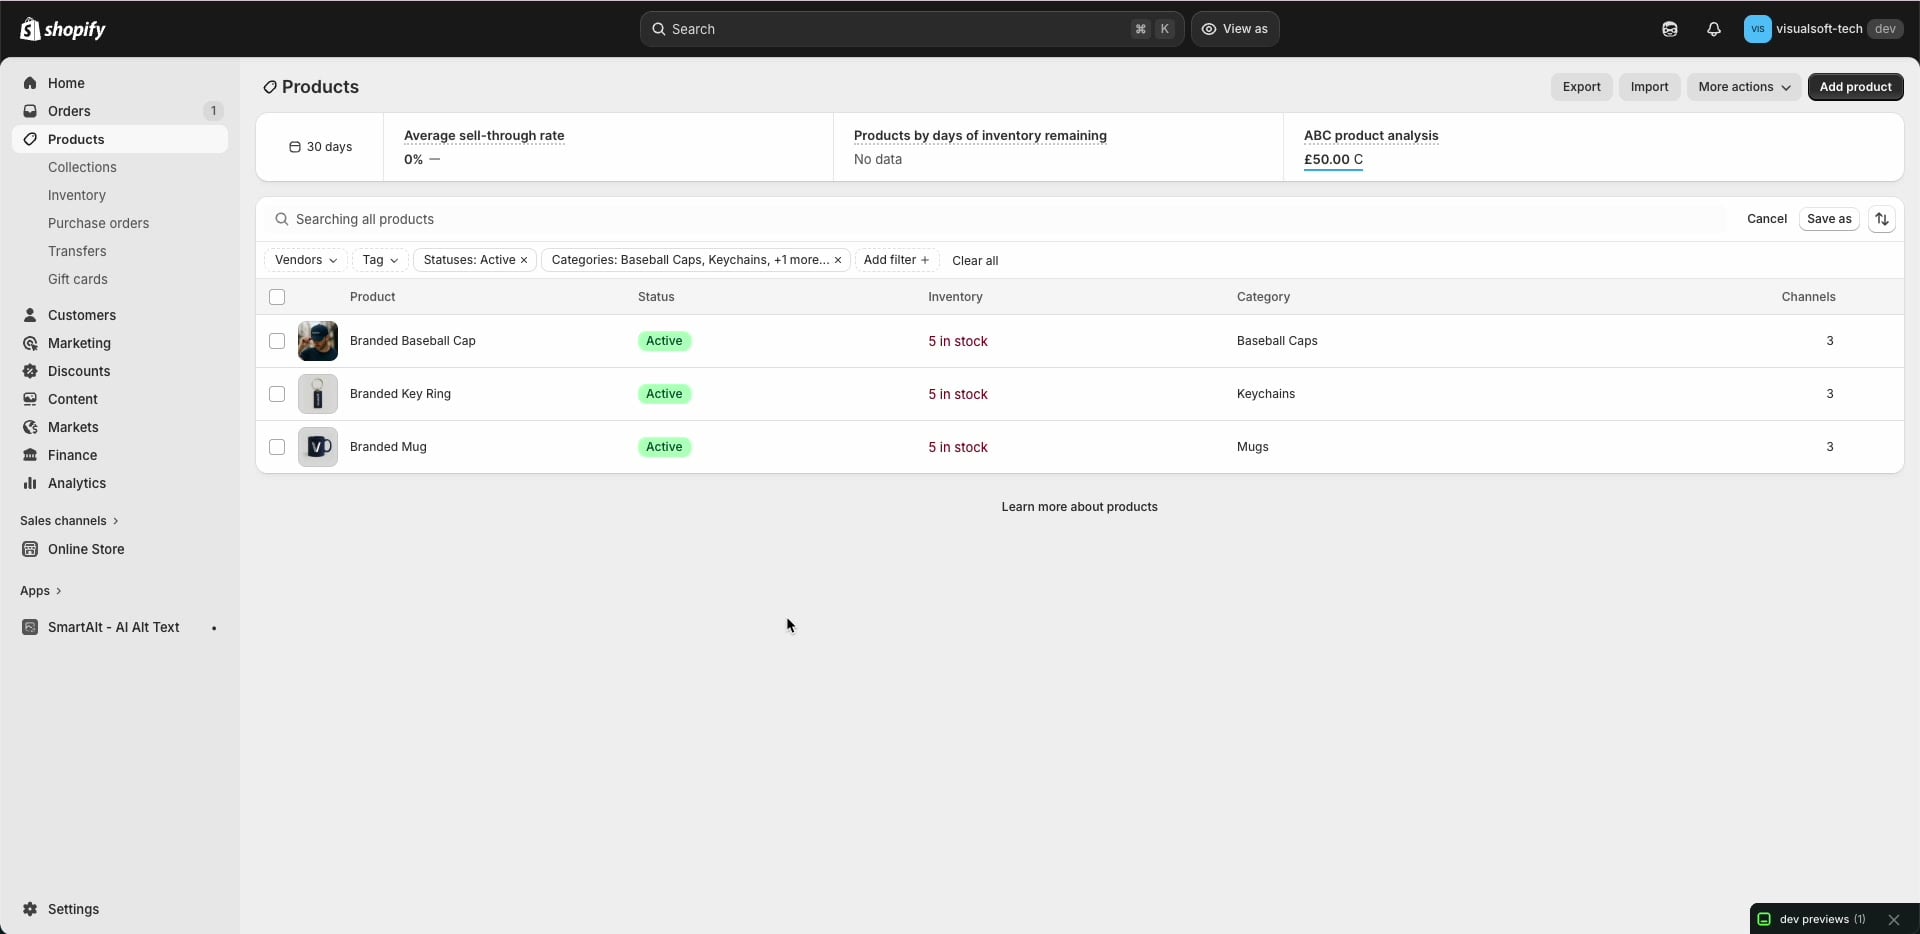
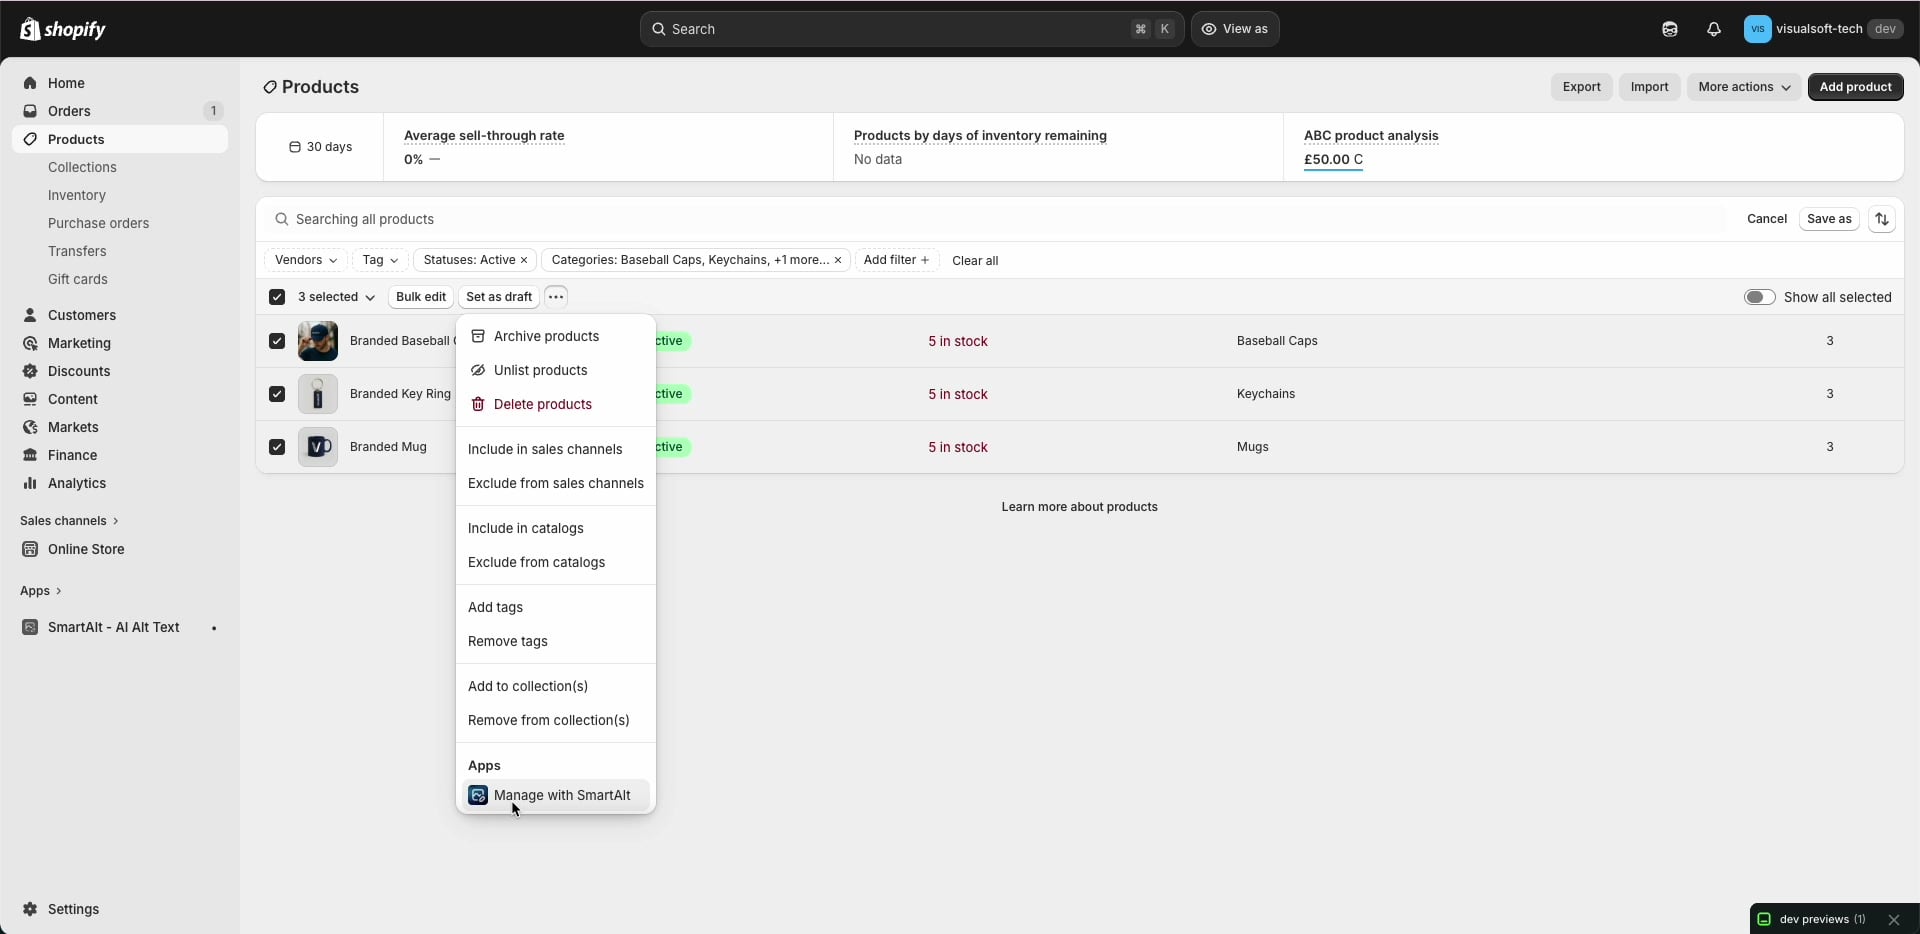
4. Confirm the filtered results - Review the list and make sure it only shows the products you want SmartAlt to manage. You should see your selected filters (for example, Statuses: Active and Categories) applied above the table.
5. Select products and choose "Manage with SmartAlt" - Select the products you want to send to SmartAlt (using the checkboxes). Then open the More actions menu (the … menu) and, under Apps, choose Manage with SmartAlt.
NOTE
If you don’t see Manage with SmartAlt, confirm SmartAlt is installed and you’re selecting at least one product.
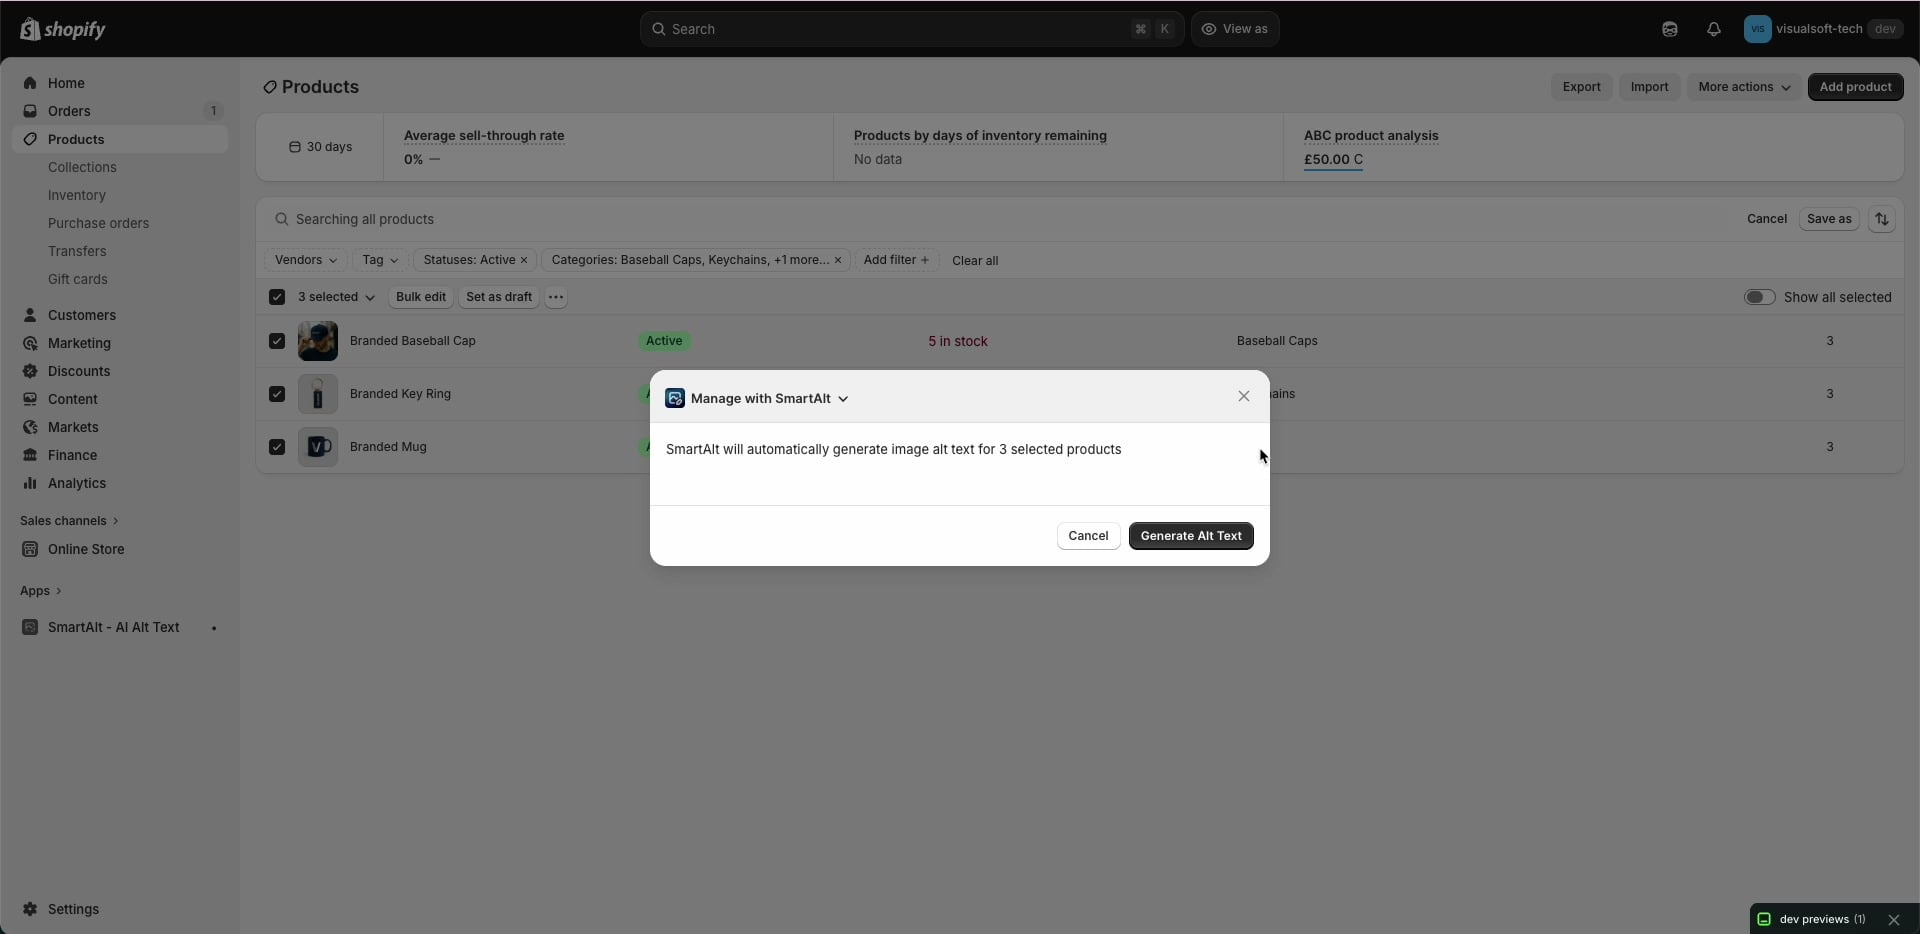
6. Confirm and generate alt text - A confirmation modal opens titled Manage with SmartAlt. Review the message and click Generate Alt Text to start generating alt text for the selected products.
WARNING
Alt text generation applies to the products you selected in Shopify. Double-check your selection before clicking Generate Alt Text.
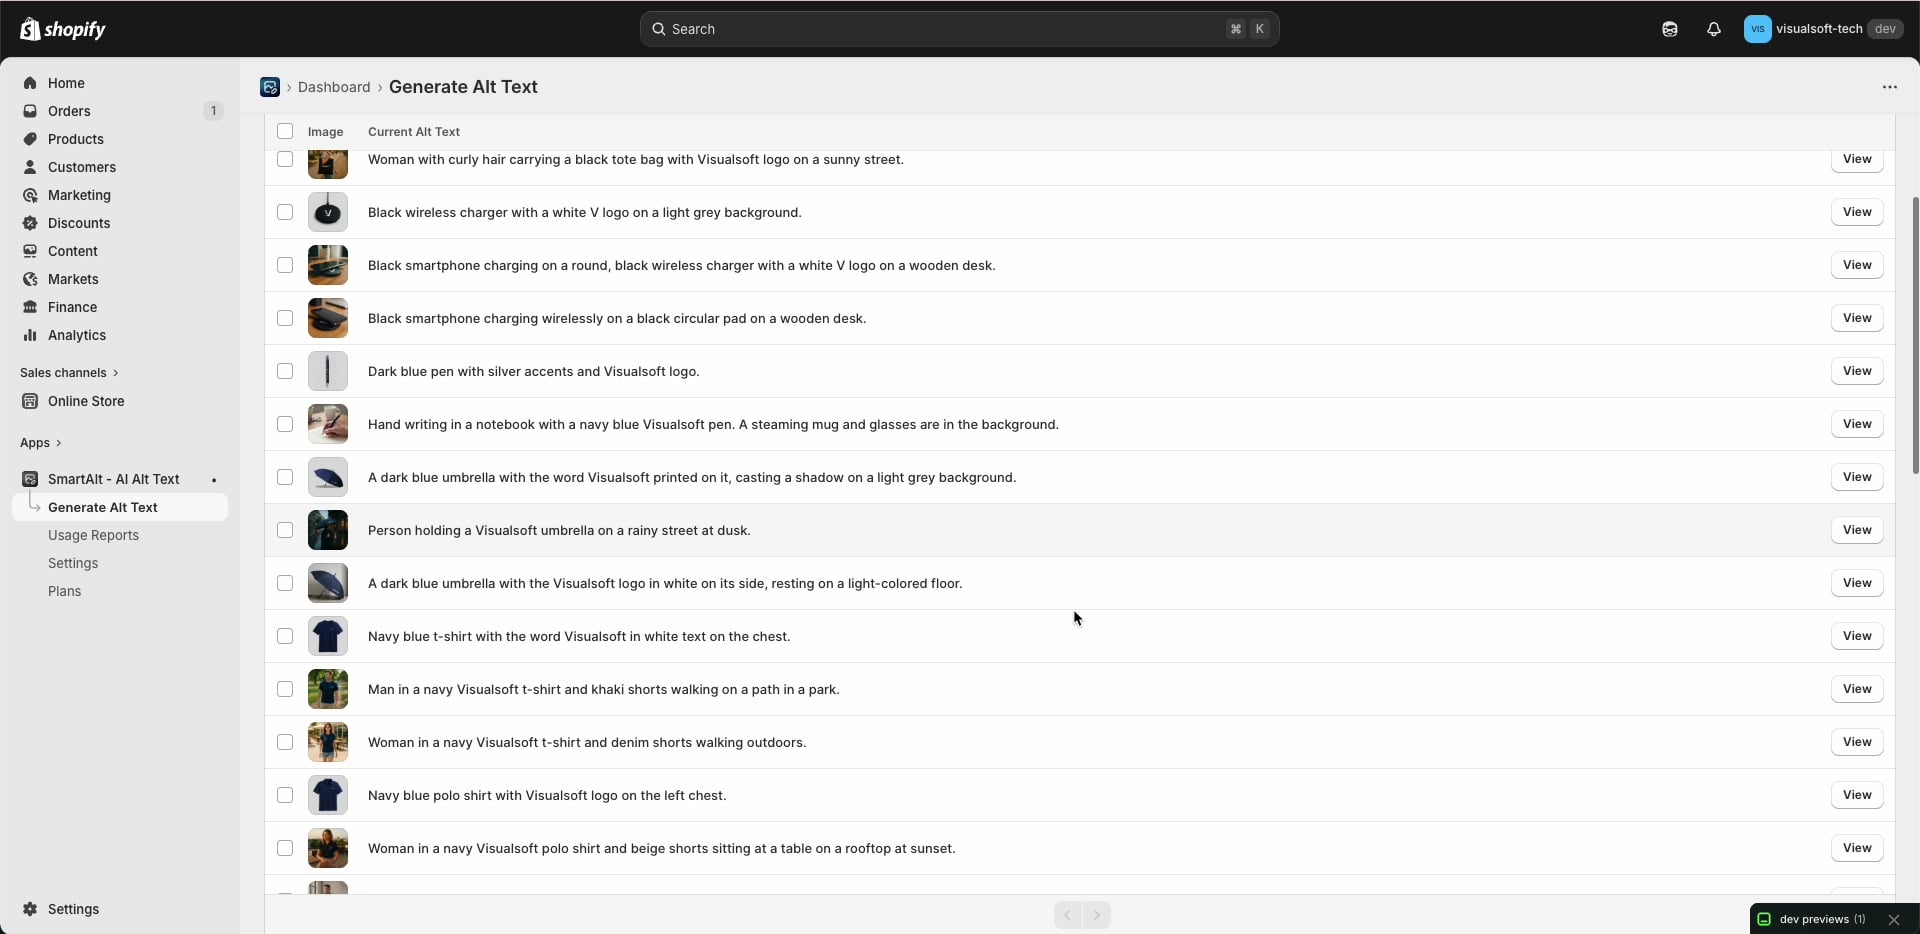
7. Review results in SmartAlt - You’ll be taken to SmartAlt’s Generate Alt Text screen, where you can review generated results in a list (with an image preview and the Current Alt Text). Use the View button on a row to inspect individual items.
Why this is the best workaround
Shopify filtering is more flexible than SmartAlt’s dashboard filters for organizing products.
You stay in control of exactly which products are included by filtering first and then selecting only what you need.
It’s repeatable—save filter views in Shopify for recurring SmartAlt runs (for example, specific categories or statuses).
Q. What filters can I use before sending products to SmartAlt?
A. Use the filters available on Shopify’s Products page. In the walkthrough, the selection is narrowed using Statuses and Categories. You can also use other Shopify product filters available in your store’s admin (for example, vendor or tag), then send the resulting selection to SmartAlt via Manage with SmartAlt.
Q. Does SmartAlt change my product status or category?
A. No. The SmartAlt flow shown here is focused on generating image alt text. Your Shopify product organization (status, category, etc.) remains managed in Shopify.